
Workspace access in Limecraft can be managed through individual workspace roles, allowing you to control what users can access and do within a specific workspace. You can assign default or custom roles, invite new members and manage existing permissions to suit your team's needs.
Limecraft provides two ways to manage user access:
- Team-based access control: Manage users at account level and grant them access to multiple workspaces through teams.
- Workspace roles: Grant users specific access and permissions within an individual workspace.
You can combine both methods to give users the right level of access across your Limecraft account.
This article explains how to invite, manage and remove workspace members, and how to configure their roles.
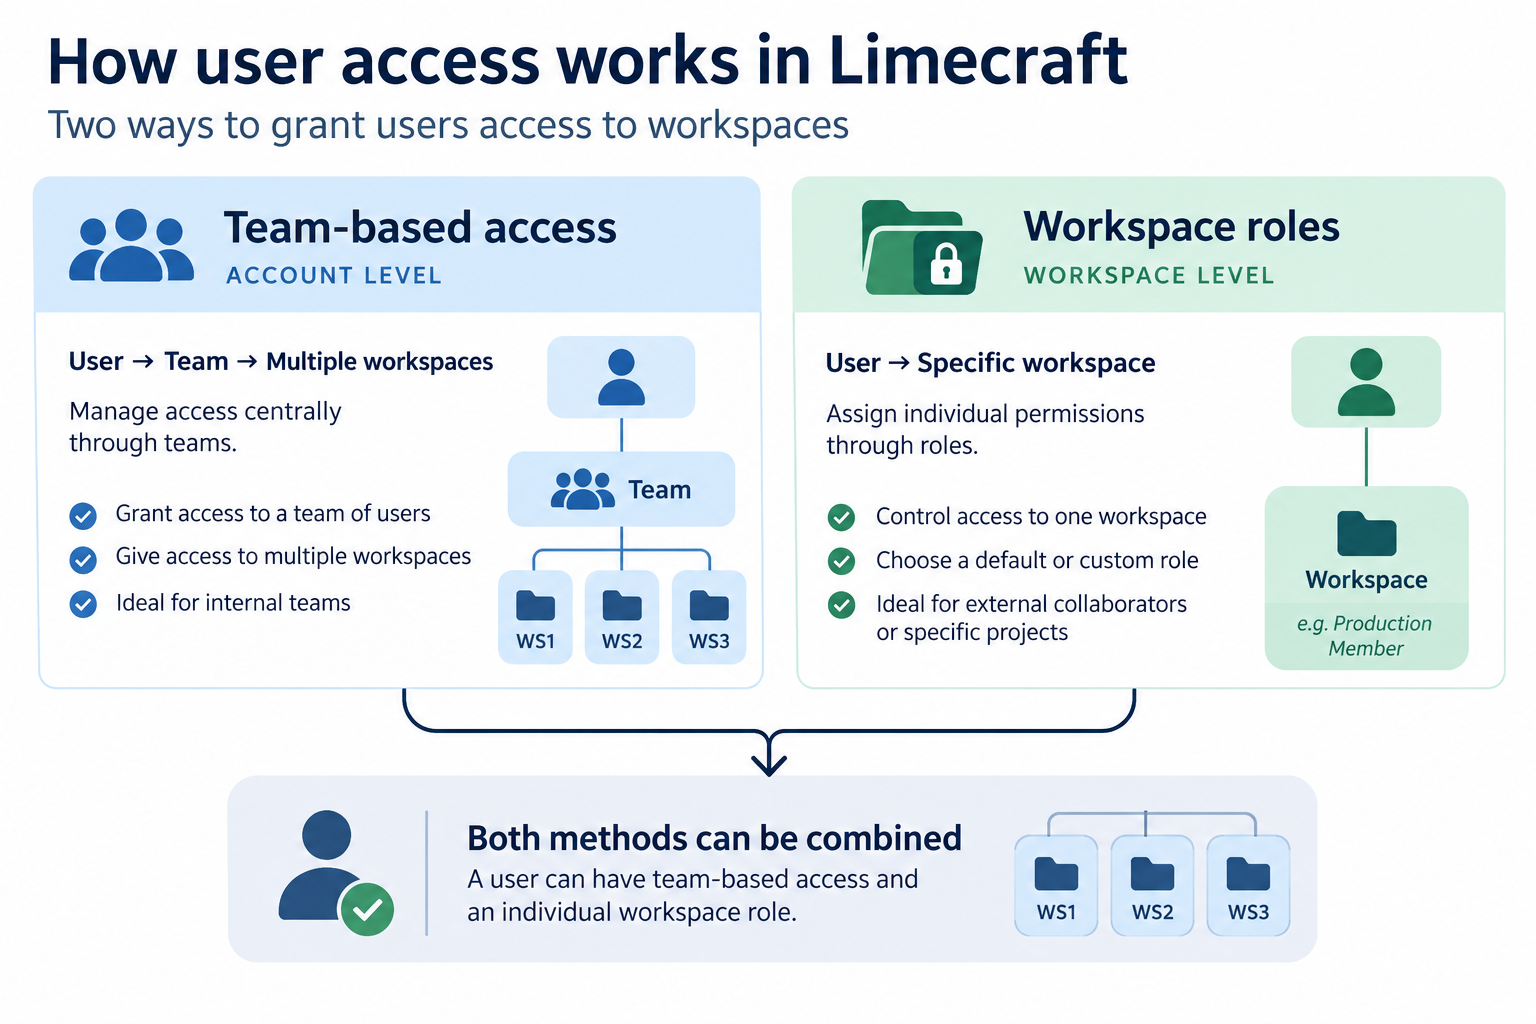
TABLE OF CONTENTS
- Before you begin
- Invite workspace members
- Understand workspace roles
- Create custom roles
- View workspace members and their access
- Edit a user's workspace permissions
- Remove a user from a workspace
- What if the user has access through a team?
- What if you want to remove a user from the entire account?
Before you begin
You need Workspace Administrator or Account Administrator permissions to access the Workspace Members settings.
Invite workspace members
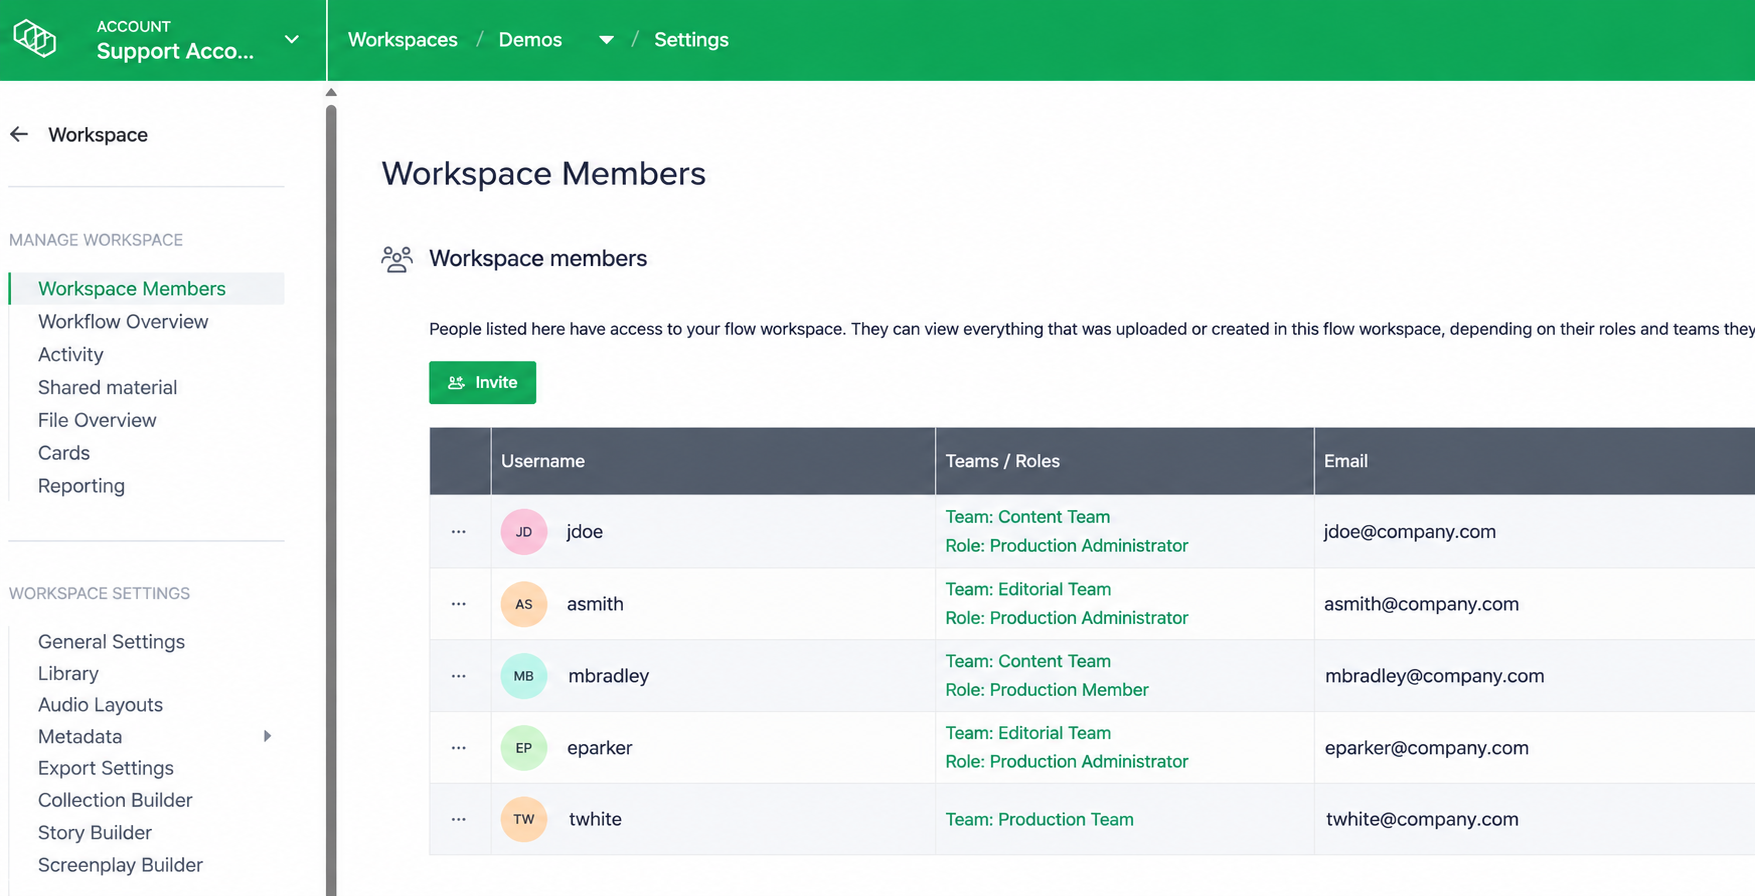
To give someone access to a specific workspace, you can invite them directly as a workspace member.
- Open the desired workspace.
- Go to Workspace settings > Workspace Members.
- Click Invite.
- Enter the email address or addresses of the user you want to invite.
- Select a role for the new members:
- Chose one of the default roles: Production Administrator or Production Member.
- Alternatively, select a custom role if one has been created.
- Click Send invitation email.
Once sent, the invitations appear in the Pending Workspace Invitations section below the Workspace Members list until the invitation has been accepted.
Understand workspace roles
Workspace access is managed through roles. A role determines which actions a user can perform within a workspace.
Limecraft provides two default roles:
| Role | Permissions |
| Production Administrator | Can manage the workspace and its members, and Production Member permissions. |
| Production Member | Has access to manage media and use the applications enabled in the workspace. |
Create custom roles
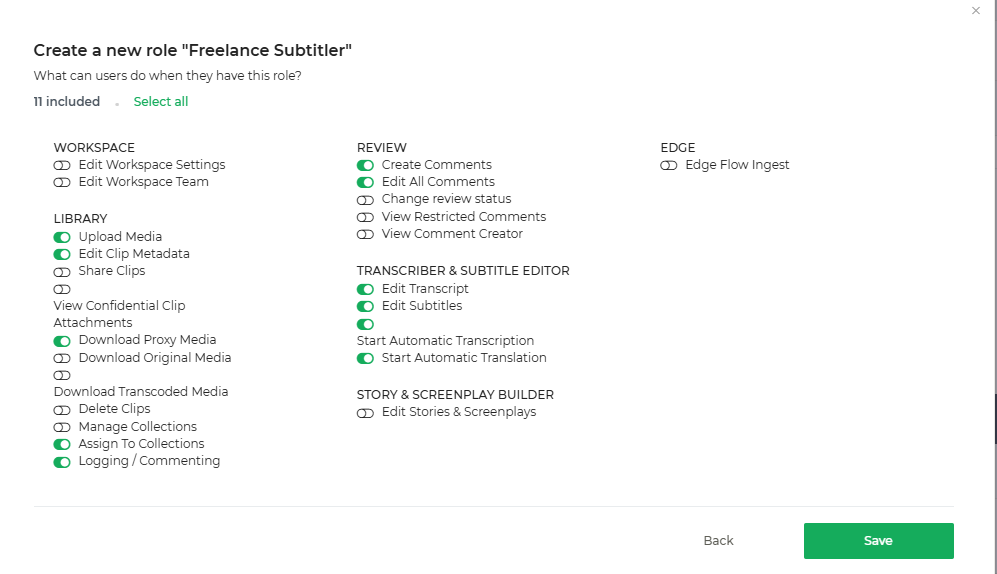
You can also create custom roles to tailor permissions to specific users or use cases.
For example, you might want to give external collaborators or freelance users access to selected features without granting them the full permissions of a Production Member.
To create a custom role:
- Go to Workspace settings > Workspace Members.
- Find the Roles section.
- Click the option to add a role.
- Configure the permissions you want to grant.
- Save the new role.
The custom role will then be available when inviting or editing workspace members.
View workspace members and their access
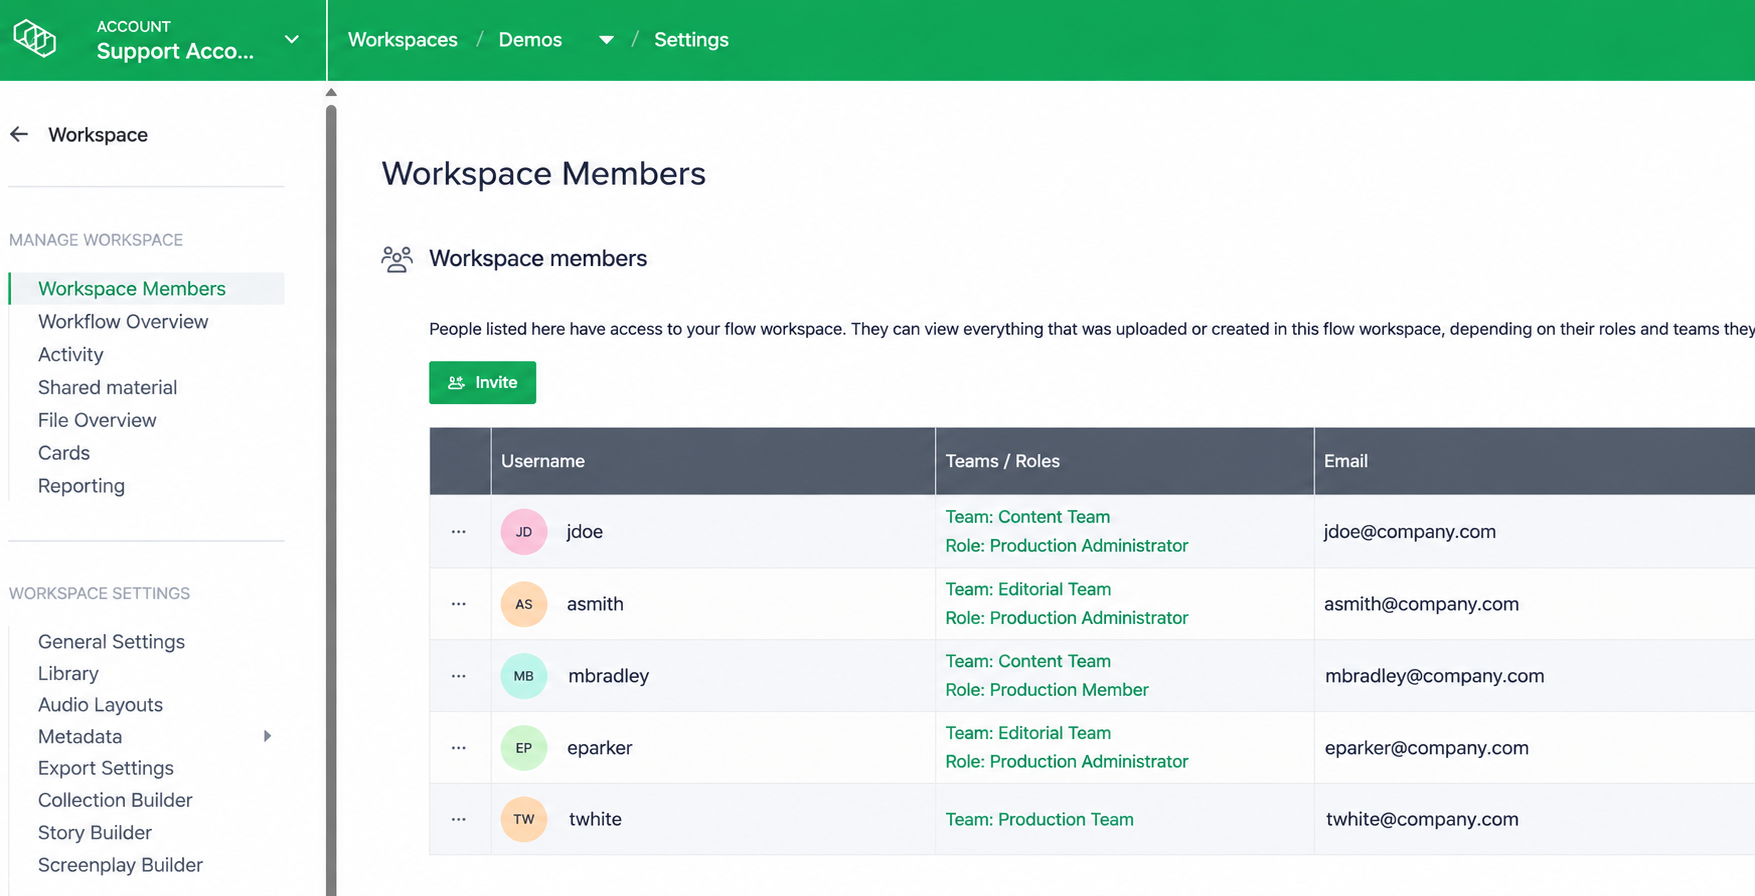
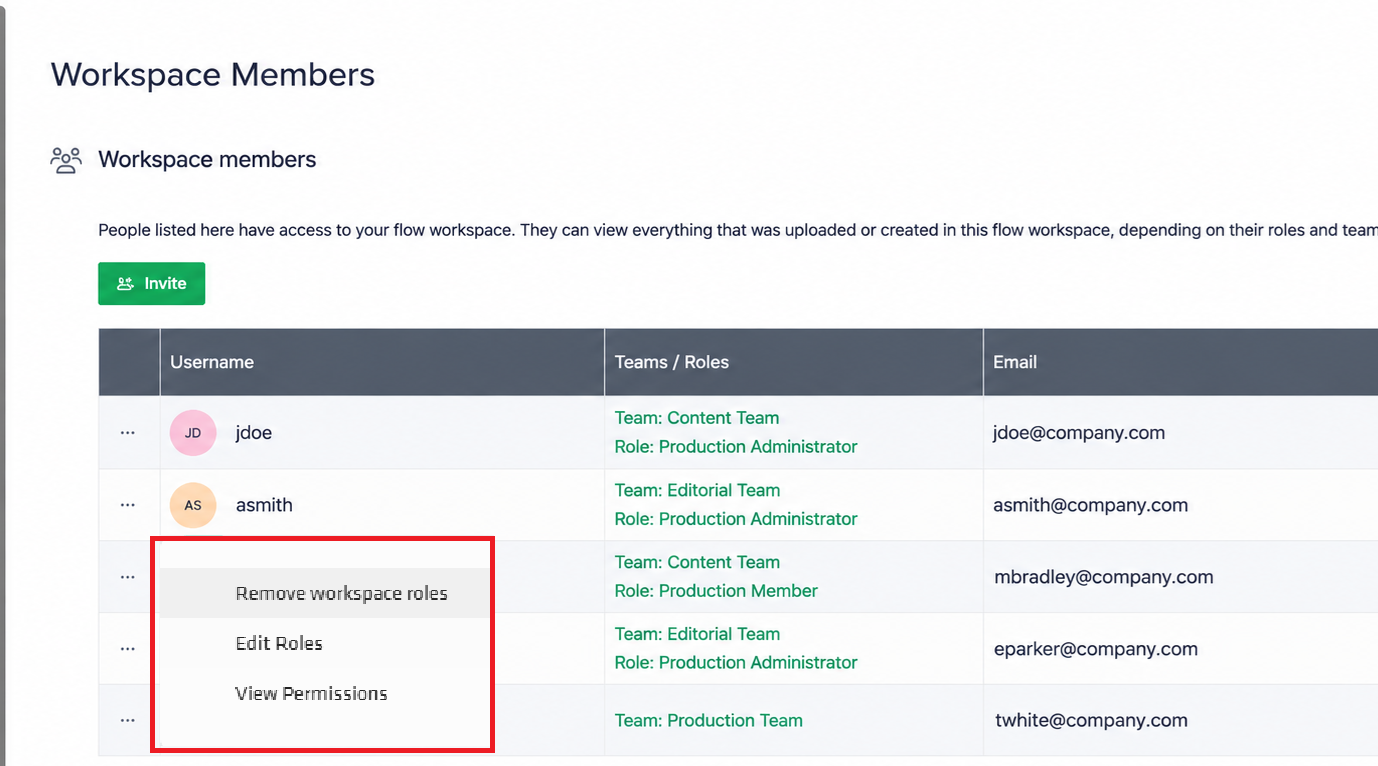
The Workspace Members section provides an overview of everyone who currently has access to the workspace.
The listing includes:
Username: The user's username
Email: The email address associated with their account.
Roles: The roles and access methods assigned to the user.
The Team/Roles column shows how a user has obtained access to the workspace. A user may have access through a team, a workspace role, or a combination of both.
Edit a user's workspace permissions
To change a user's workspace permissions:
- Go to Workspace settings > Workspace Members.
- Find the user in the Workspace Members list.
- Click the three-dot menu next to their username.
- Select the option to edit their access.
- Update their workspace role and permissions as required.
- Save your changes.
Remove a user from a workspace
To revoke a user's access to a specific workspace:
- Go to Workspace settings > Workspace Members.
- Find the user in the Workspace Members list.
- Click the three-dot menu next to their name.
- Select the option to remove the user from the workspace.
- Confirm the removal if prompted.
Important: Removing a user from a workspace only revokes their access to that particular workspace. It does not remove their access to other workspaces or from your Limecraft account.
What if the user has access through a team?
If the user has access to the workspace through a team, removing their workspace membership alone will not revoke that team-based access.
To remove their access, you need to remove them from the relevant team in the account settings.
Note: Account Administrator permissions are required for managing team-based access.
What if you want to remove a user from the entire account?
To revoke a user's access across your Limecraft account, manage their access through the user listing in Account settings.
For more information, see our guide to managing team-based access control.