Limecraft automatically turns spoken words in broadcast-grade subtitles in minutes. Using Automatic Speech Recognition (ASR) and Natural Language Processing (NLP), the services takes care of the queueing or spotting. Spotting rules are pre-configurable, thus saving up to 80% of the time.
Editing subtitles
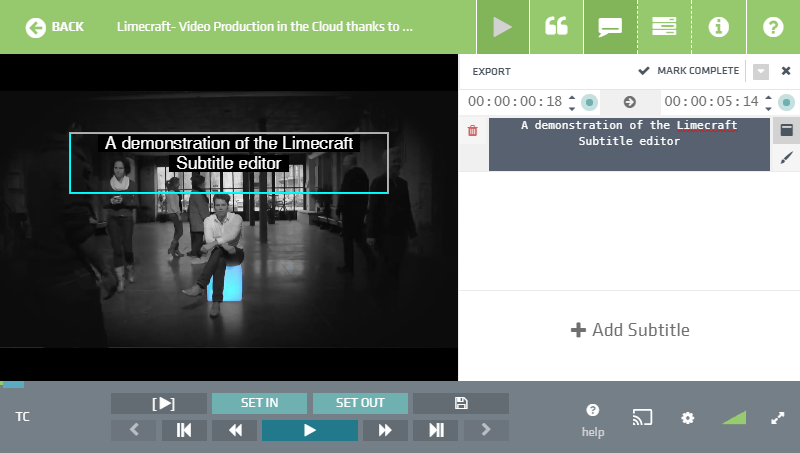
You can use the Subtitle Editor to edit the stream of subtitles, simply click on the subtitle and it will go into edit mode. Clicking outside the subtitle will save your changes. Pushing the Esc key on your keyboard will abort your changes.
Tip: Because ASR may throw more or less errors depending on the audio quality, it will be necessary to correct the result of the AI transcription first. As mentioned in the article 'tips for efficient post-editing of transcripts', the transcription app is better suited to correct these mistakes. Therefore we advise to use the transcription app before generating subtitles.

Changing TIME IN/TIME OUT
While editing a subtitle, the appearance and disappearance time of the subtitle are shown at the top of the subtitle. You can type in a new timecode, or use the arrow keys to change the timecode one frame at a time.

But the best way to change the timing is to move the playhead to the desired location in the video and press the little green circle next to the timecode. This will copy the current playhead position into the timing field. This is the same as clicking the SET IN (F9) or SET OUT (F10) buttons.
Note: you can use the “Play IN to OUT” button (F8) to preview the time range!
Alternatively, you can drag the in and out points of the subtitles on the timeline below the controls.
Change the subtitle position (top / bottom region)
The exact top and bottom region of the subtitles can be defined in the Subtitle Editor settings in the Workspace Settings settings. Read more about it here.
Change the colours
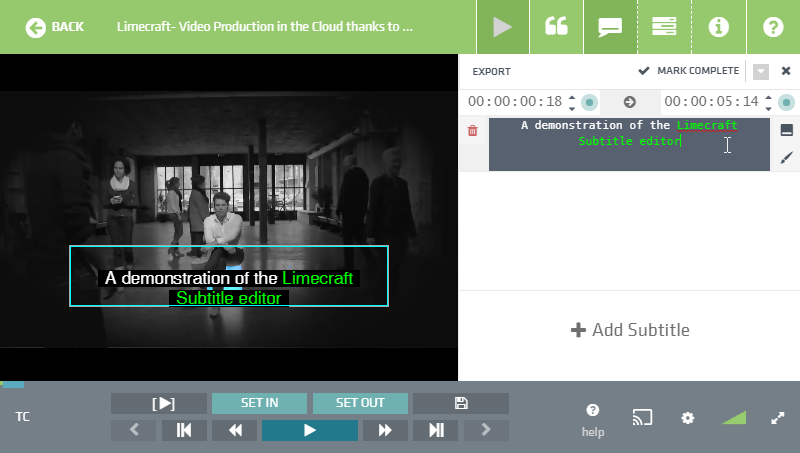
When creating subtitles for the deaf and the hard of hearing (SDH), it is common to use a different colour per speaker. Select some text in the edit box, and press the button with the brush icon. A menu with text colours will appear. In the example below, we changed the text colour to green. If no text is selected and you change the colour, the entire subtitle will change colour.
The color options are defined in the Subtitle Editor setting in the workspace settings settings. Read more about it here.
Delete a subtitle
Press the button with the trash can to delete a subtitle.
Warnings
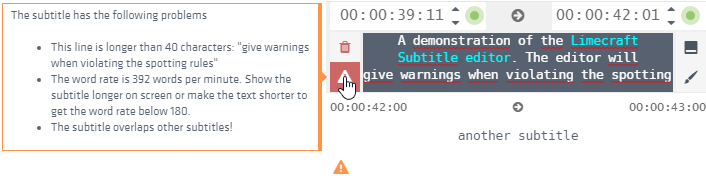
While editing a subtitle, you might see an exclamation triangle appear on the subtitle. This means you are violating one of the subtitle specifications set in the production configuration.
Too many characters
The example below has too many characters on a single line and too many words for the subtitle duration.

The subtitle will be verified while editing.
Subtitle overlap
The icon might even turn red, which means you are in trouble. A red icon means the subtitle overlaps other subtitles, which will prevent the subtitle from saving. For example, this subtitle overlaps the next subtitle:
If you try to save this subtitle, the subtitle will turn orange and inform you of the overlap:

You can either press ‘back’ to manually solve the issue, or press ‘fix’ to shorten the subtitle automatically.
Changing the Status to 'Completed'
Furthermore Limecraft allows you to filter on the subtitling status of a clip. This makes it easy to find all clips which have no subtitles yet, or for which subtitles are completed:

Note: you can always revert the status to ‘editing’ if you marked a clip ‘completed’ by accident.
Reset subtitles

Subtitle actions
Below the Delete Subtitles option, you can find a number of other Subtitle Actions that allow you to further refine and improve the subtitles.

Exporting subtitles
You can export the subtitles in a variety of formats (closed captions), or burned-in in the video (open captions). Check the article 'Exporting Subtitles' in the knowledge base.
Asking for help
The help button on the far right will show a menu with a ‘talk to us’ option. Click it to get in touch. We will help you out if you get stuck for some reason, and we would like to hear your experiences with the application!

Download Subtitle Editor Cheat Sheet
Download the cheat sheet, print it, and hang it on your wall!